Motivation
As the focus motor of my photo setup is driven by the Avalon Linear, my focuser does not have a temperature sensor. The Esprit is by far not as bitchy as some other famous refractors in this range. So far I helped myself by initiating an autofocus run from time to time. Usually I initiated a focus run every 90 minutes which is more than necessary. In the second part of the night even less focus runs are adequate. Sequence Generator Pro (SGP) allows this way of controlling autofocus runs in a quite easy way. My intension was to improve this using a temperature sensor.
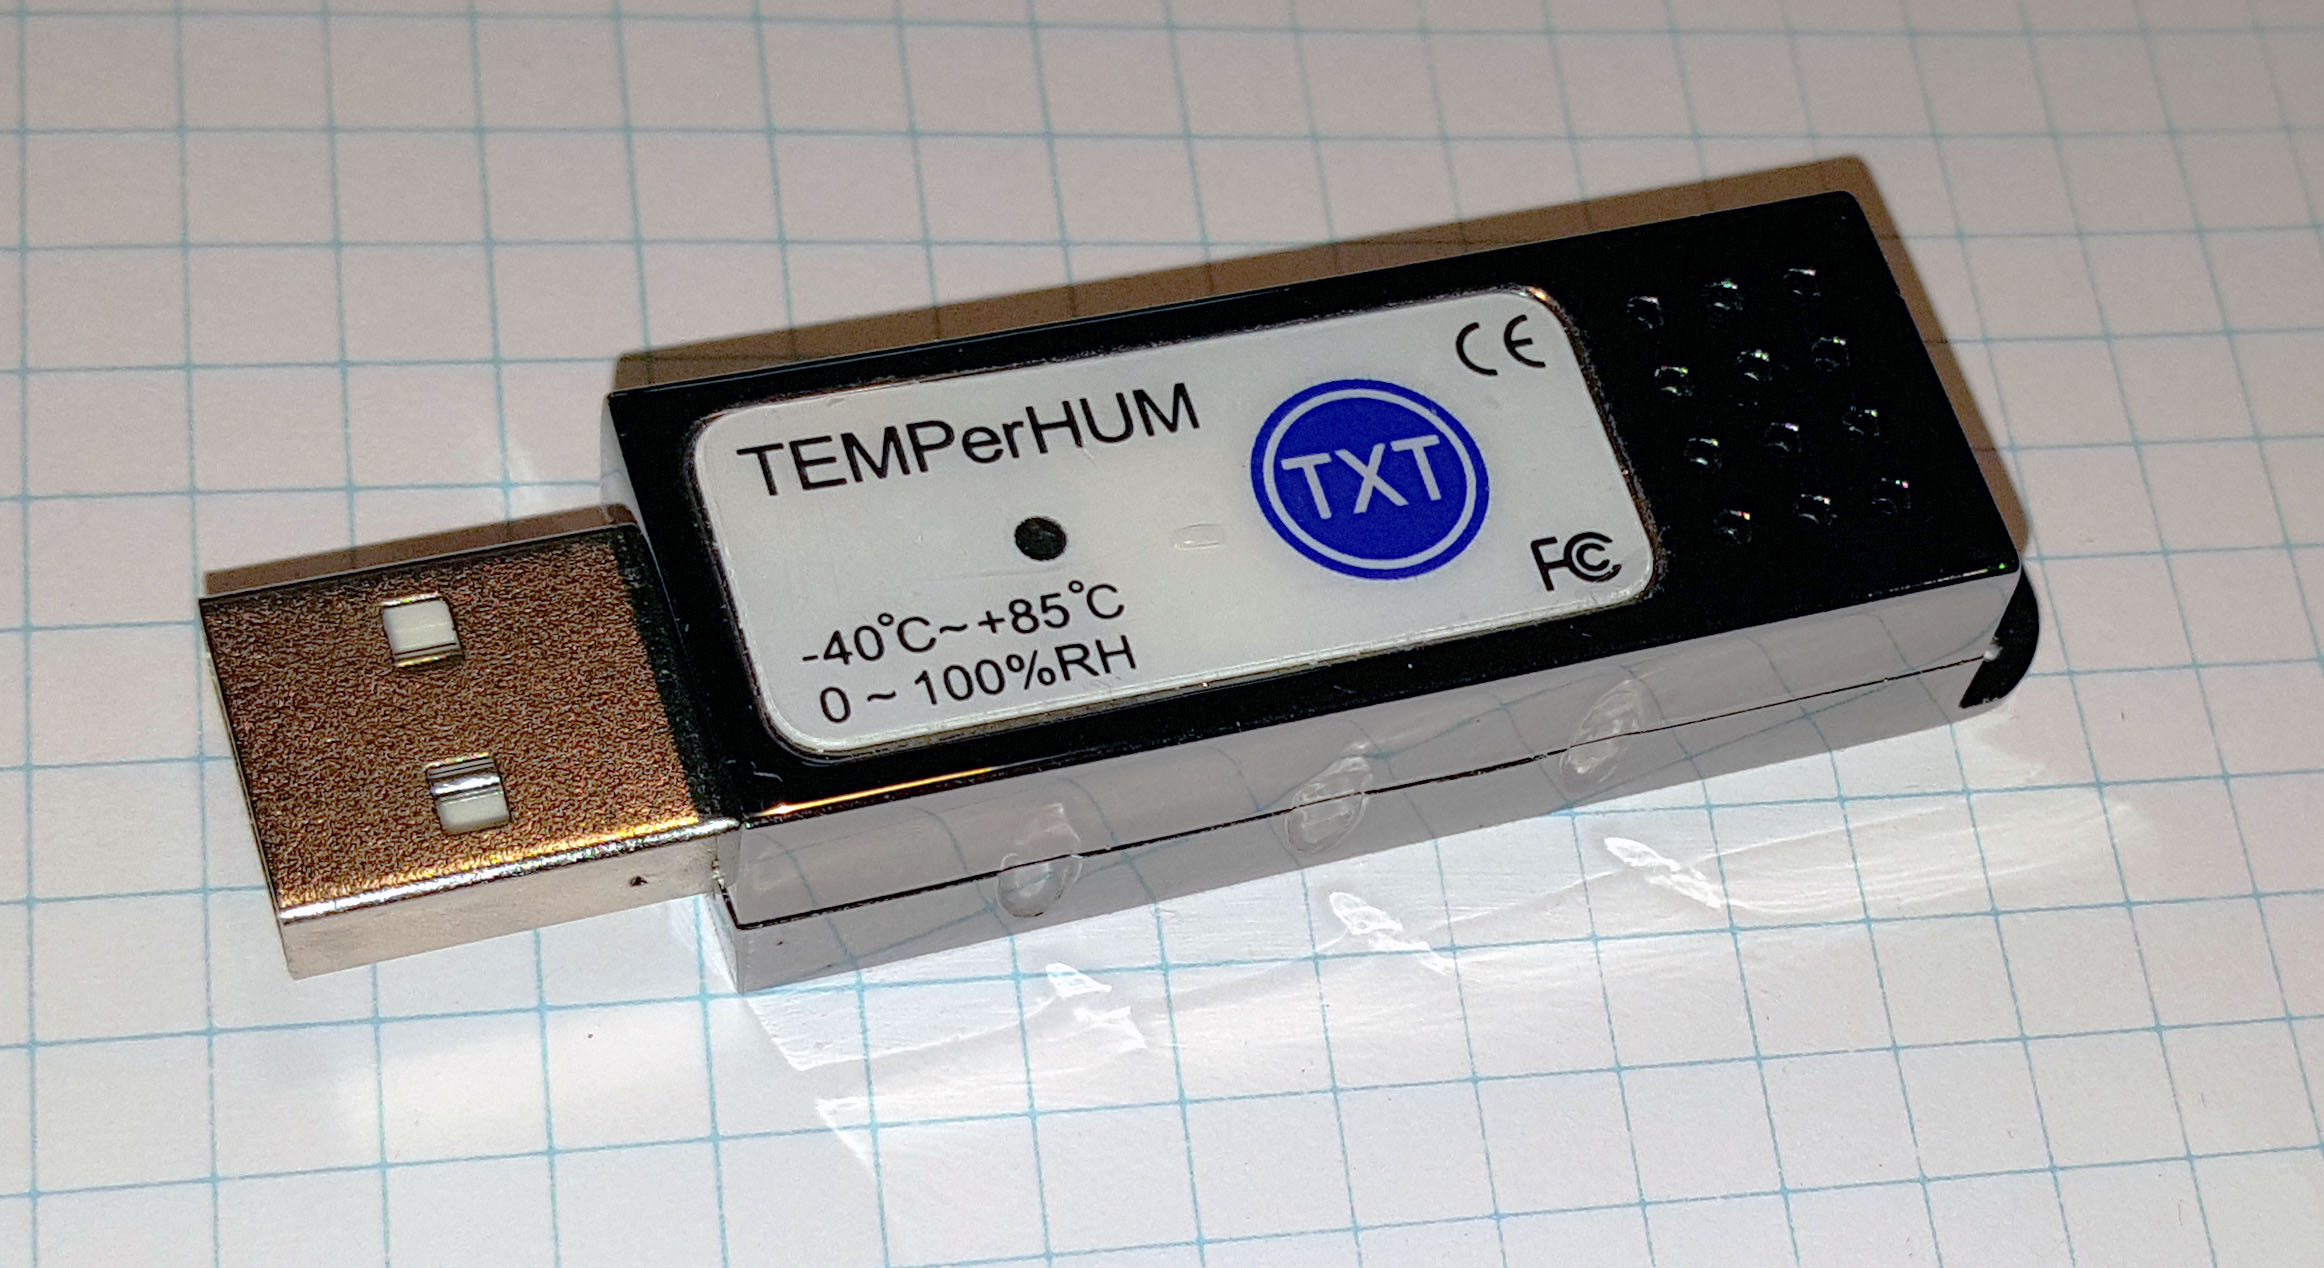
SGP allows to evaluate other sensors for focusing as well. So my first idea was to trigger focus run by the temperature sensed by a TEMPerHUM stick. Acually SGP works with ASCOM devices. The TEMPerHUM stick is an exception, but it is not supported officially. Then happened, what had to happen: My stick operated with APT but not with SGP. The BlueAstro USB weatherstation would be an ASCOM compatible solution, but it is not available due to the passing of Per Frejvall.
Thus I came to the conclusion that I had to design my own solution. Based on an Arduino the hardware part should not be a real issue, but developing the ASCOM driver was fully new for me.
Sensor Hardware
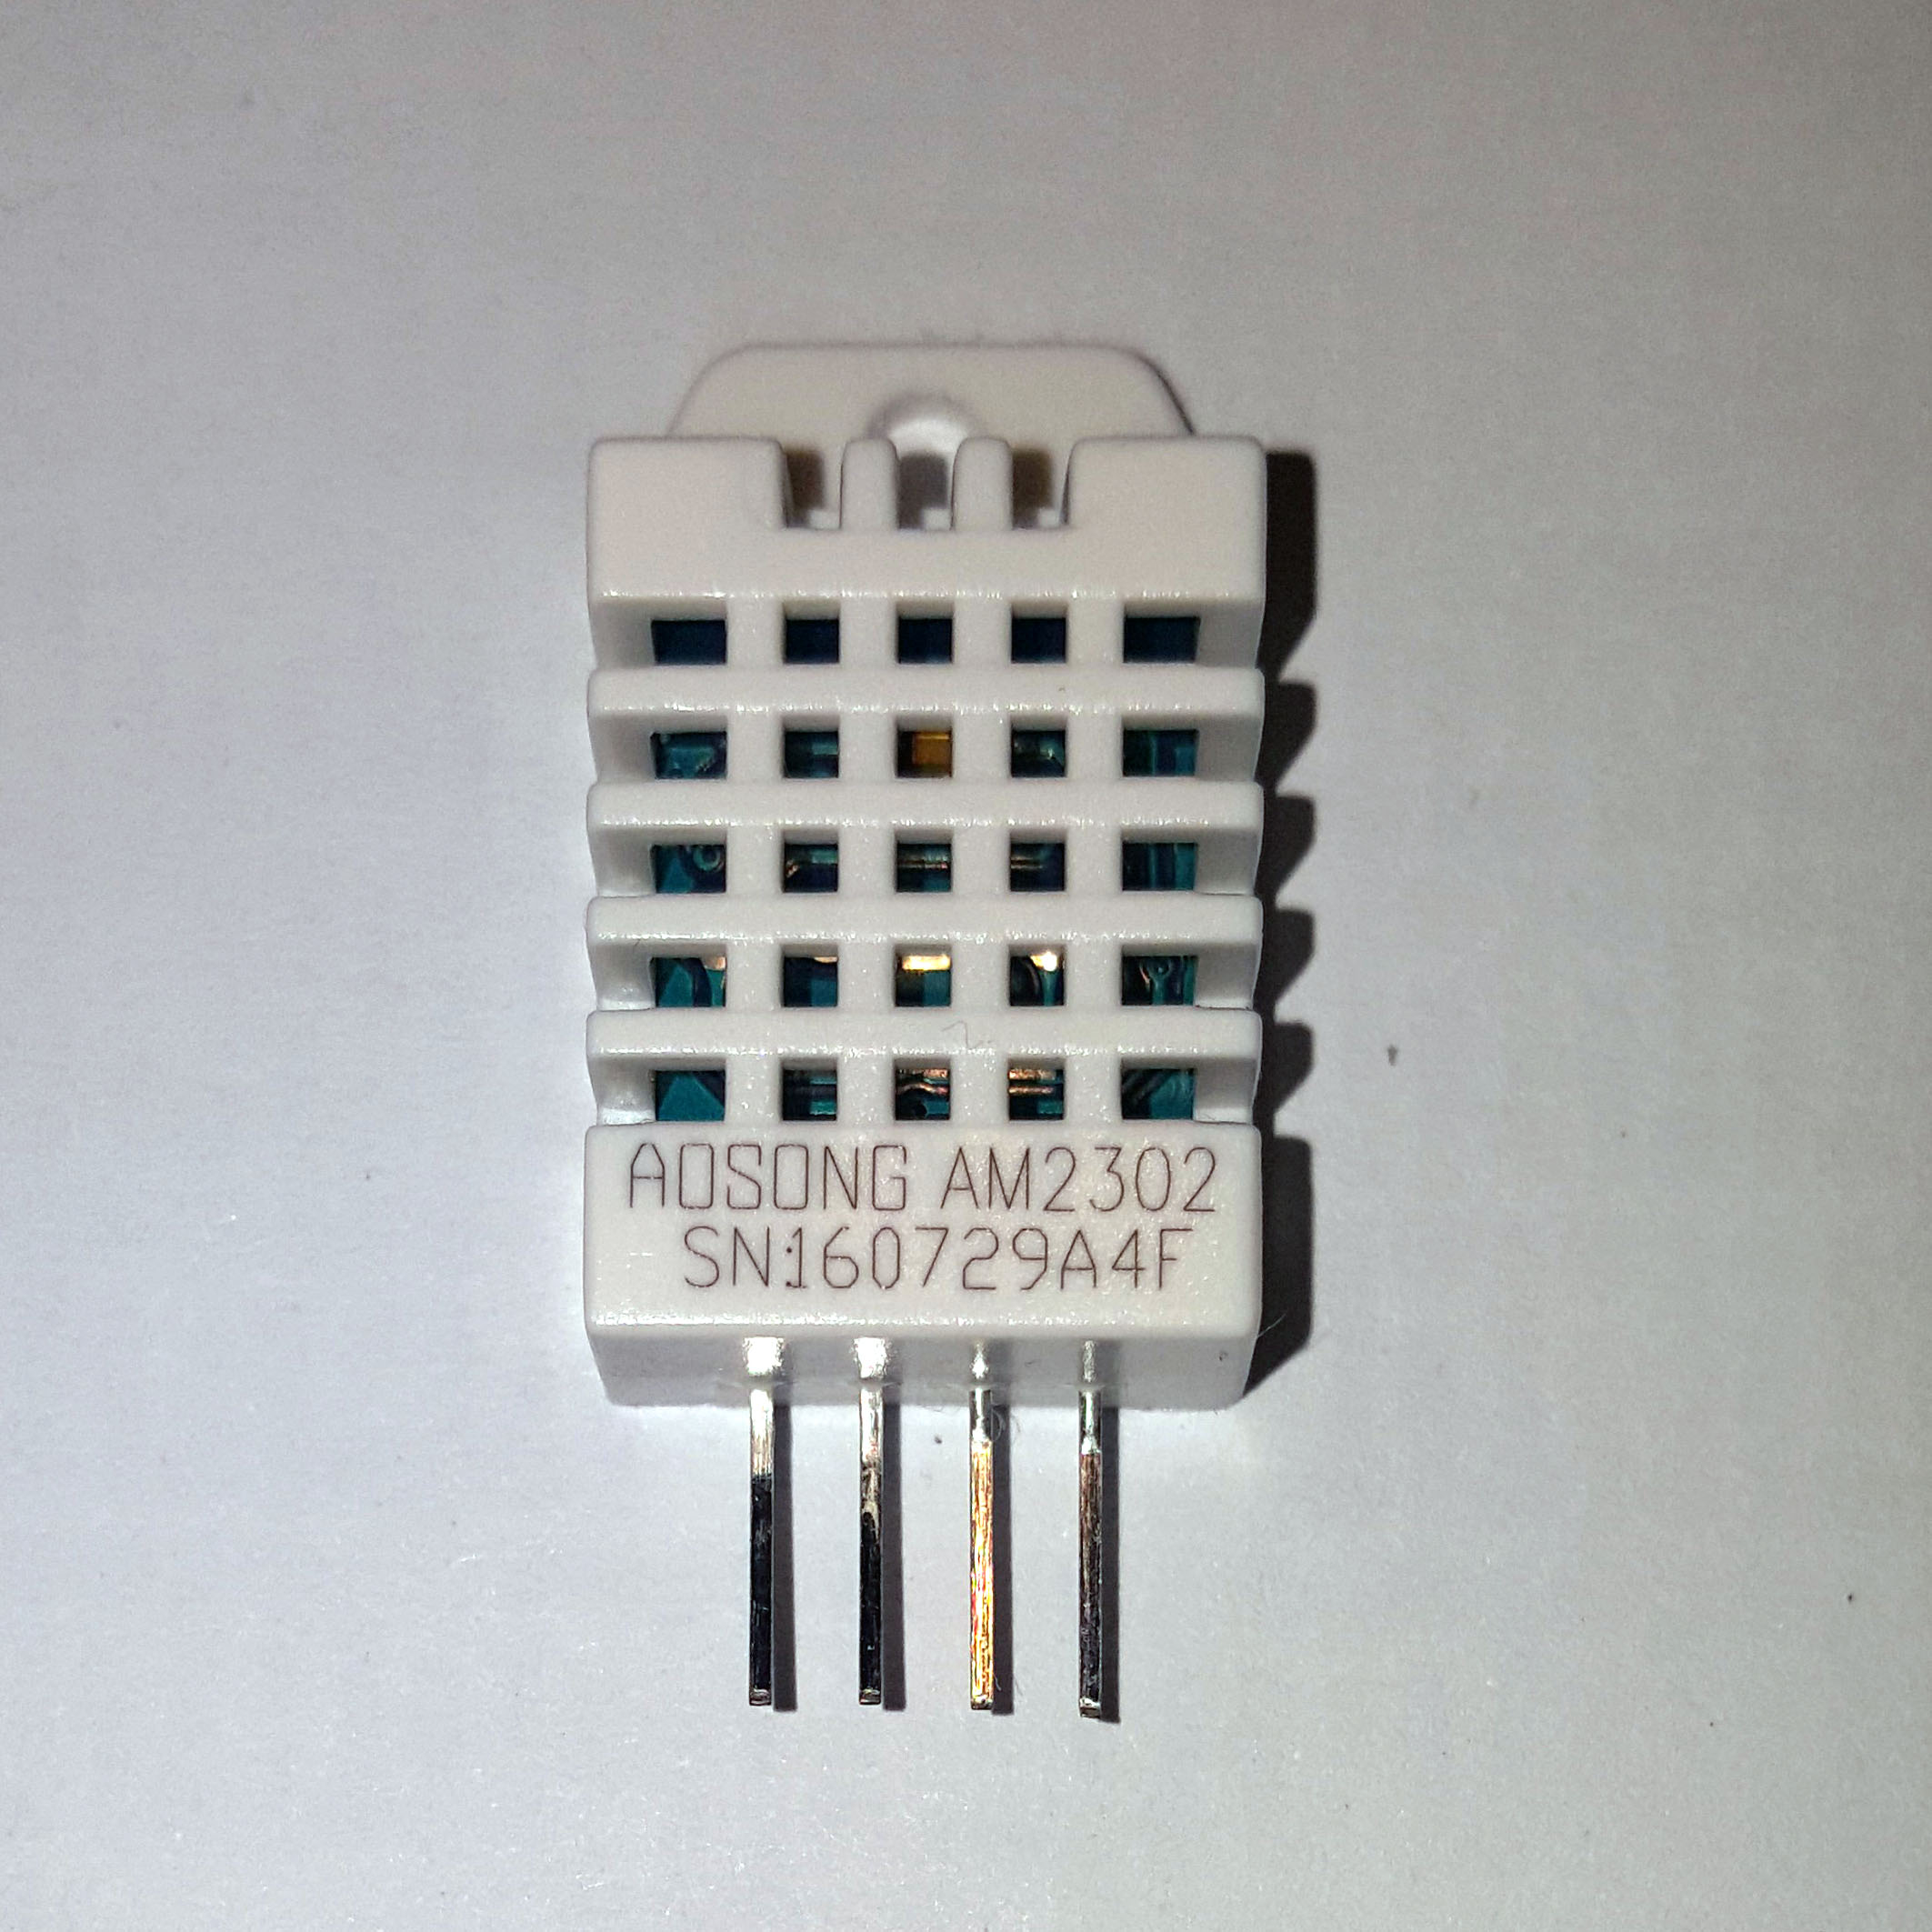
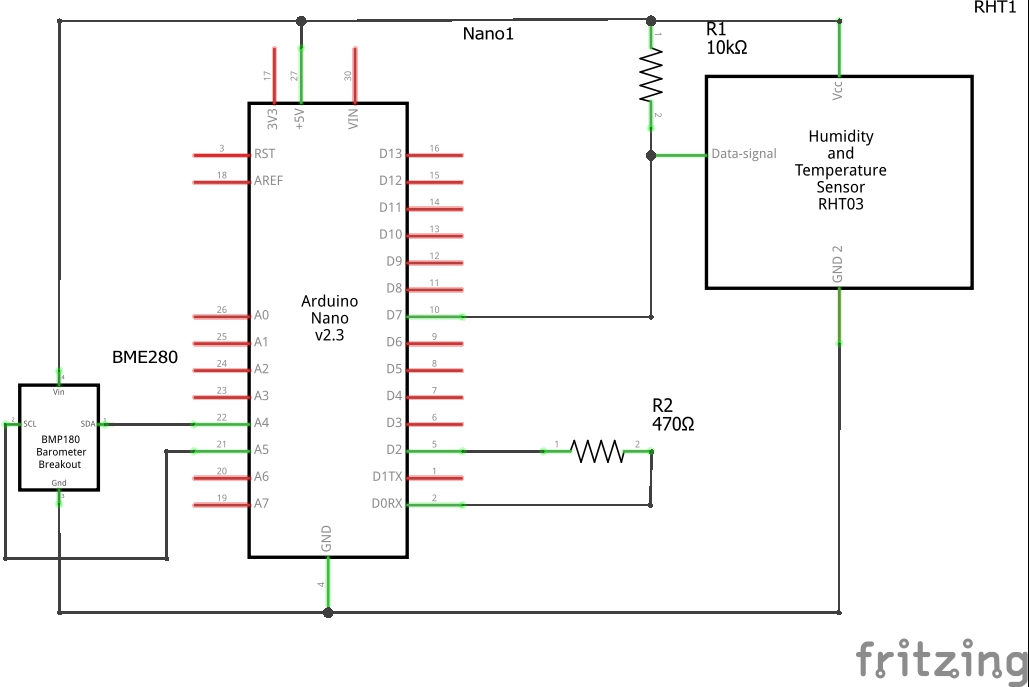 The sensor hardware consists of an Arduino Nano PCB and a DHT22 sensor for temperature and humidity. A BME280 breakout board is used for air pressure. This device measures temperature as well, but this value currently is not used by the software. The breakout board is one of the cheap ones and containing only a BMP280 sensor, which is not capable to measure humidity. Hence the I2C adress is 0x76 (BMP280) and not 0x77 (BME280) and the chip identifier is not 0x60 (BME280) but 0x58 (BMP280). One has to modify the lib Adafruit_BME280.h accordningly before compiling.
There are many sketches to be found dealing with that parts. I added an energy save function, which allows the Nano to sleep most of the time. The interrupt for awakening is triggered by the serial communication. This is bit unusual, as the first part of serial communication coming from the computer certainly will get lost in this scenario, but my drivers care for that case. My system seems to run stable without any issues.
The circuit is straightforward and very easy to realize. One should be careful to match the pins with the pin numbers of the sketch. The sleep mode reduces the supply current which is drawn from the USB connector. Removing the power LED from the PCB and introducing the sleep mode reduced the the current from 32 mA down to 12 mA. I think this is worth it for two reasons: Firstly in the field I only have limited energy available, secondly current produces heat and this compromises temperature measurements in a narrow compartment.
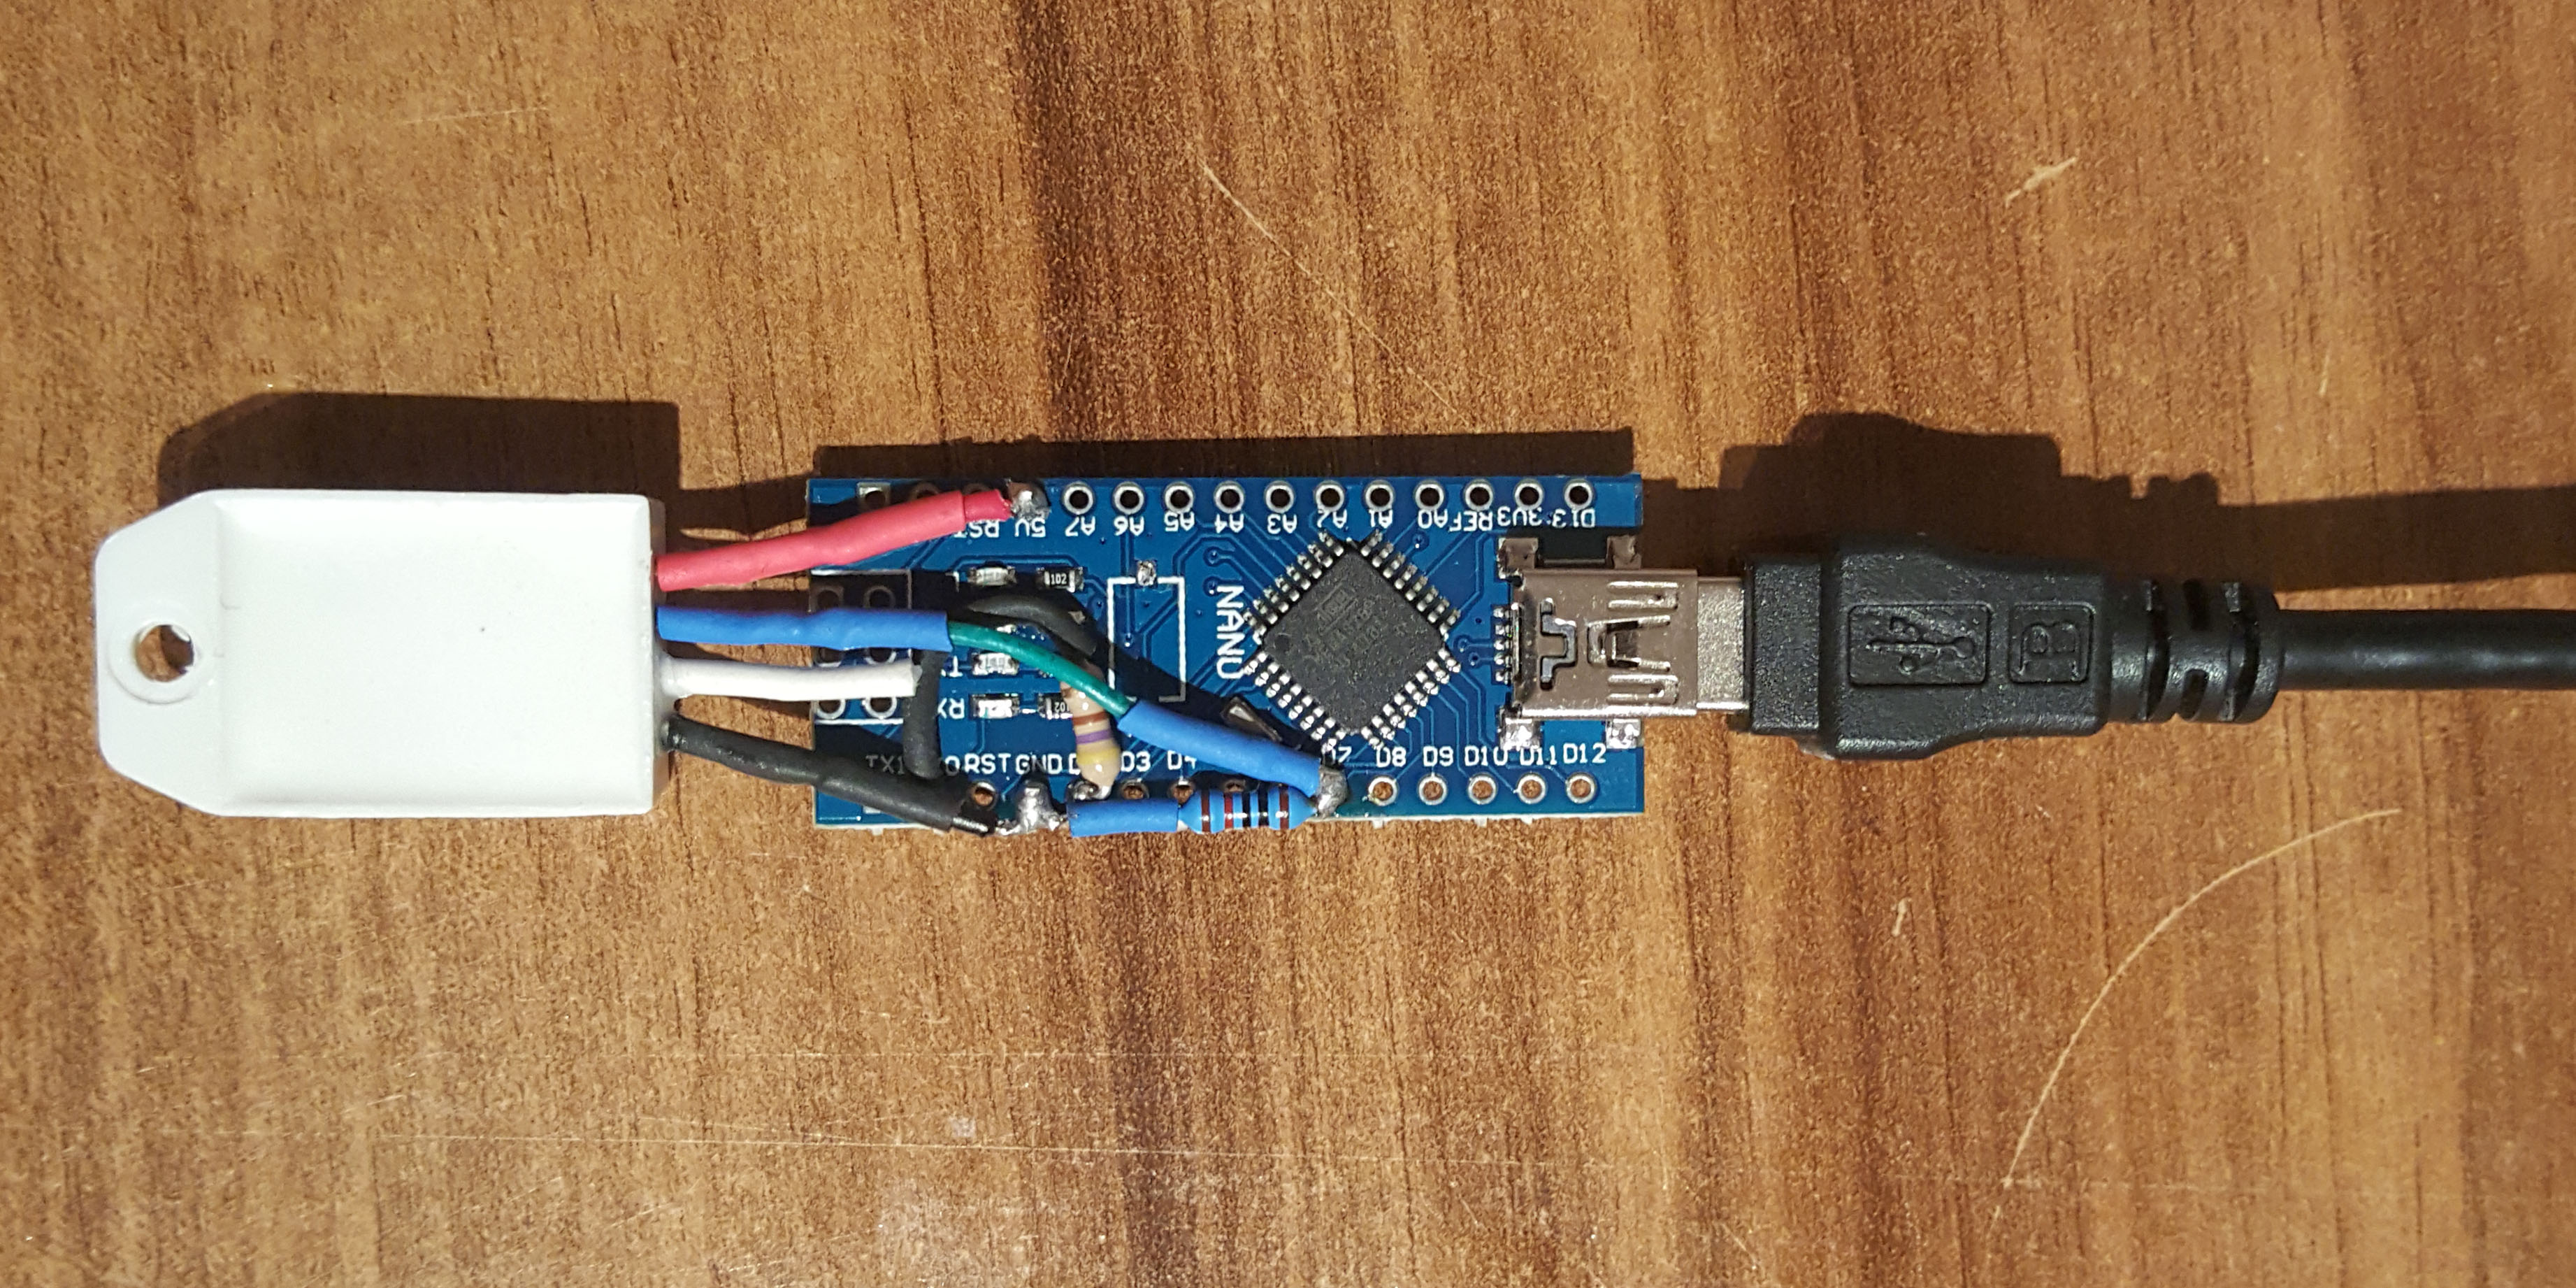
The photo shows my experimental setup where the DHT 22 is soldered directly upon the Nano. I used this system for developing the ASCOM code. The final arrangement fits in a 65 mm x 32 mm x 20 mm box. At one side the DHT 22 sits and the USB socket sits at the opposite side. Below is a gallery showing the final temperature sensor in its box.
Software
Software downloaded from this web site is provided ‚as is‘ without warranty of any kind, either express or implied. You should know what you do. Any action you take upon the information on this website is strictly at your own risk.
ASCOM Telescope Driver
The ASCOM driver (version 1.1.0) is available to download here. Off course, the ASCOM Platform should be installed before this driver. I coded the driver based on a skeleton of an ASCOM Observing Conditions driver in VB. It runs successful at my office PC under Windows 10, at my telescope control notebook under Windows 7 and at a virtual machine running Windows 7, as well.
If somebody wants to compile an own version, I’ve shared the source code at Github.
#include <DHT.h>
#include <avr/sleep.h>
#include <Wire.h>
#include <Adafruit_Sensor.h>
#include <Adafruit_BME280.h>
/* for the BMP a modified BME280 library is used 		*/
/* changes are: default I2C adress from 0x77 to 0x76	*/
/* Chip identifier from 0x60 to 0x58					*/
/* the I2C pins of the Nano are pin 4(clock) and 		*/
/* pin 5(data) which have to be connected to the 		*/
/* BMP module 											*/
/********************************************************/
#define VERSION 3.0 /* Version of this code				*/
/********************************************************/
/* INT_PIN muss mit Pin 2 über 470 Ohm verbunden sein. 	*/
/* Da Tx identisch mit Pin 2 ist, löst die serielle  	*/
/* Schnittstelle bei Aktivität den Interrupt aus.    	*/
#define INT_PIN 2
/********************************************************/
/* some definitions for the DHT22						*/
#define DHT_PIN 7
#define LED_PIN 13
#define DHTTYPE DHT22
/********************************************************/
/* if height above sealevel should be calculated		*/
#define SEALEVELPRESSURE_HPA (1013.25)
/********************************************************/
/* prototypes											*/
DHT		dht(DHT_PIN, DHTTYPE);
/********************************************************/
/* global variables										*/
float 	humidity, temperature, bmptemperature, bmppressure;
Adafruit_BME280 bme; /* for I2C comms 					*/
/********************************************************/

void setup()
{
    Serial.begin(57600);
    Serial.flush();
    Serial.println("Booting ...");

    pinMode(INT_PIN, INPUT);      	// Pullup for INT_PIN
    digitalWrite(INT_PIN, HIGH);  	// Arduino sleeps untils serial get actice.
    pinMode(LED_PIN, OUTPUT);     	// LED for activity status
    dht.begin();

    // default settings
    bool status = bme.begin();
    if (!status) {
        Serial.println("Could not find a valid BME280 sensor, check wiring!");
        while (1);}

    messung();                     	// just to have valid data ready
    Serial.println("Init done ...");
    delay(100);						// to ensure not sleep to early
}

void loop()
{
    digitalWrite(LED_PIN, LOW);   	// switch off LED
    enter_sleep();					// and sleep
    // snooze.... chrrr.... until serial comms brings CPU to life
    digitalWrite(LED_PIN, HIGH); 	// woke up: switch LED on

    messung(); 						// measure ..
    String cmd;

  for (int i=0; i <= 5000; i++){
    delay(1);
      while (Serial.available() > 0){
          cmd = Serial.readStringUntil('#');
          if (cmd == "TEM") {
              Serial.print(temperature); Serial.println('#');}
          if (cmd == "HUM") {
              Serial.print(humidity); Serial.println('#');}
          if (cmd == "DEW") {
              Serial.print(dewPoint(temperature, humidity)); Serial.println('#');}
          if (cmd == "PRE") {
              Serial.print(bmppressure); Serial.println('#');}
          if (cmd == "VER") {
              Serial.print(VERSION); Serial.println('#');}
        }
    }
}

void INT_PINisr(void){
/* ISR for INT_PIN 											*/
/* Detach Interrupt, one time is enough for now. Lets		*/
/* the serial communication run without any interrupts.		*/
  detachInterrupt(0);
}

void enter_sleep(void){
/* put arduino to sleep */
    attachInterrupt(0, INT_PINisr, LOW);
    set_sleep_mode(SLEEP_MODE_PWR_DOWN);
    sleep_enable();
    sleep_mode();
    sleep_disable();
}

float dewPoint(double celsius, double humidity) {
/* 	calculate dew point, not the best method, but simple	*/
/*	and good enough for our tasks							*/
    double	a 		= 17.271;
    double 	b 		= 237.7;
    double 	temp 	= (a * celsius) / (b + celsius) + log(humidity / 100);
    float 	Td 		= (b * temp) / (a - temp);
    return 	Td;
}

void messung() {
    humidity 		= dht.readHumidity();
    temperature 	= dht.readTemperature();
    bmptemperature 	= bme.readTemperature(); 		/* deg Celsius */
    bmppressure 	= bme.readPressure() / 100.0F; 	/* hPa */
}

void printBMPValues() {
    Serial.print("Temperature = ");
    Serial.print(bme.readTemperature());
    Serial.println(" *C");

    Serial.print("Pressure = ");
    Serial.print(bme.readPressure() / 100.0F);
    Serial.println(" hPa");

    Serial.print("Approx. Altitude = ");
    Serial.print(bme.readAltitude(SEALEVELPRESSURE_HPA));
    Serial.println(" m");

    Serial.println();
}