Avalon Linear Characteristics
The Avalon Linear Fast Reverse is now my main mount for for astronomical imaging. It ranks in the medium-size mount range with a weight capacity around 20-25 kg, imaging and observing, respectively.

The Avalon Linear doesn’t make use of traditional worms and gears mechanism. Instead a transmission system based on pulleys and tooth belts, for both right ascension and declination is used. Based on that the manufacturer promised a steady motion without play (no backlash) and sudden peaks. These factors are of a great relevance for long guided exposures. Especially for the declination axis motor that can now quickly reverse the motion without breaks to recover the plays.
Reasons for the Avalon Linear
The above given DE-backlash issue of my previous mount drove me really insane… The Linear mount is promised to perform guided exposures up to 20-30 minutes with punctiform stars even with optics of 2-3 meters of focal length. It seems the truth: So far I have never again rejected a light frame due to a mount issue running at a focal length up to 600 mm. Another point for me was to get rid of the casted aluminium parts continued with plastic and tolerance caching lubes. The Linear is having a better presentation: made of anodized aluminium and stainless steel, apparently milled out of single blocks.

This mount behaves slightly different than the worm driven ones I know. It is difficult to say wherein the difference lays. Presumably the essential thing is the „mechanical impedance“ of the drive. Wheras worm driven mounts more or less are „hard“ connected with the power train this one is „soft connected“. The unevitable play of a worm gear – if not chached by any grease – can be sensed manually, once you moved the gear to the end of the play the limit is hard. Totally different the Linear, here one can sense no play, but the connection of the the axis to the gear seems to be slightly softer.
Maybe the above describe charecteristics is the reason why some owners report a sensitivity to wind. I observed the same behaviour: With noticable wind during the photo session the perceived quality of the guiding graph seems to degrade. On the other hande I never have noticed any influence of the wind on the star picture quality of the frame I shot. Hence at least in my case (focal length 600 mm) this seems to be an an issue without pracitcal relevance.
Guiding
Hardware and Software used for Guiding
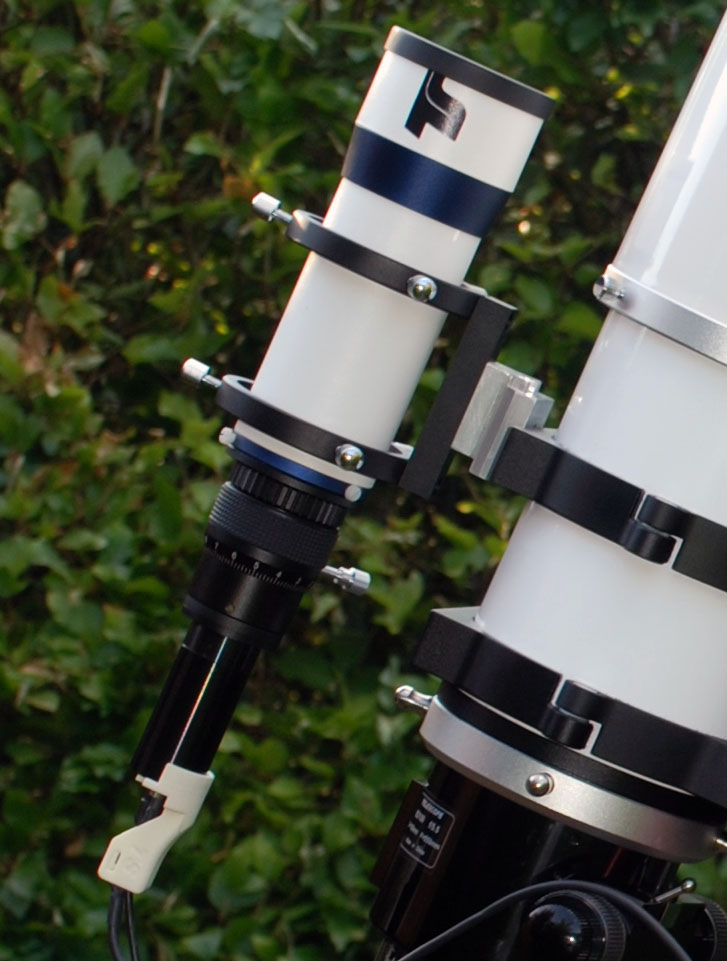
The system is used with a small guiding set-up. It consists of a 60mm f/4 finder and a Starlight Xpress Lodestar Autoguider camera. The camera provides by far enough sensitivity in order to have always a suited guiding star in the view field. Hence the optical axes of the guider and the main scope can be adjusted parallel and no adjustment during the photogrphix set-up has to te done anymore.
Frome the beginning on the guiding programm of my choice was the free PHD guiding from Stark Labs. In the meantime it rearranged to PHD2, which is the enhanced second generation version. Still available free of charge, PHD is now an open-source project, supported by an active community. In my opinion this is an exellent tool for imaging.
Guiding Performance
During the first sessions with my Avalon I sometimes wondered that some nights showed poor guiding performance and some not. The reason was quiet easy:
The Avalon is rather direct, wheras my GP was not. So with the GP one always guides at the borders of the drive precision. The difference of better and poorer nights gets lost in the tolerances of the system. The Avalon allows to make use of a better seeing, because one is able to control it more precise. This accompanies the observation that I’m getting even smaller star pictures with the same optical train.
The graphs give an impression of the achieved performance during a night with good seeing. In such a night all snapshots of the guide camera lay inside a circle with a diameter of one arc sec.

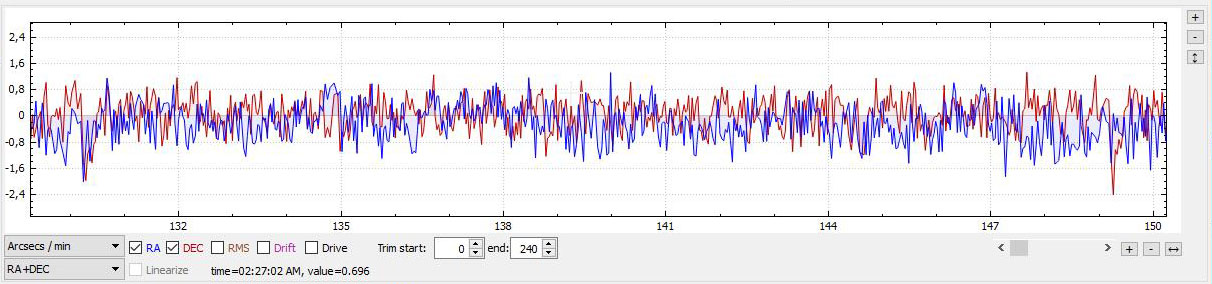
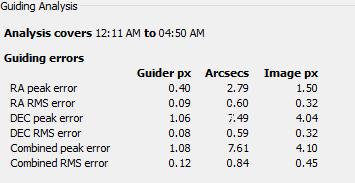 The RMS error during this session was 0.60 arc sec in DE and 0.59 arc sec in RA. Needless to say that no frame of the night had to be rejected.
PHD Guiding Parameters for the Linear
It took me a while to find my best set of PHD parameters. In the meantime Avalon Instruments placed a suggestion for a good starting point here. During my setting to work I had the helpful page of Sara Wager.
Transport
I use the mount as well in my garden as in the field. Therefore transport is also a task for me. Available transport cases for the mount didn’t convince me. For that reason I decided to built my own case. Since all boxes I found didn’t had the matching size I had to start from scratch building up a wooden transport box. My goal was not to waste space in order to keep the box as small as possible. During the nightly session the box shall also be used as stool.

The outside of the box is multilayer varnished and should withstand nightly humidity, inside it is only single layer varnished. Fixations aids are inside the box to receive and to fix during transport following parts:
- the mount
- counter weight shaft
- counter weight 4 kg or 6 kg (is fixed with the Avalon fixing screw of the mount)
- screws for tripod ground plate
The pictures below show the box empty and filled with all mount parts.
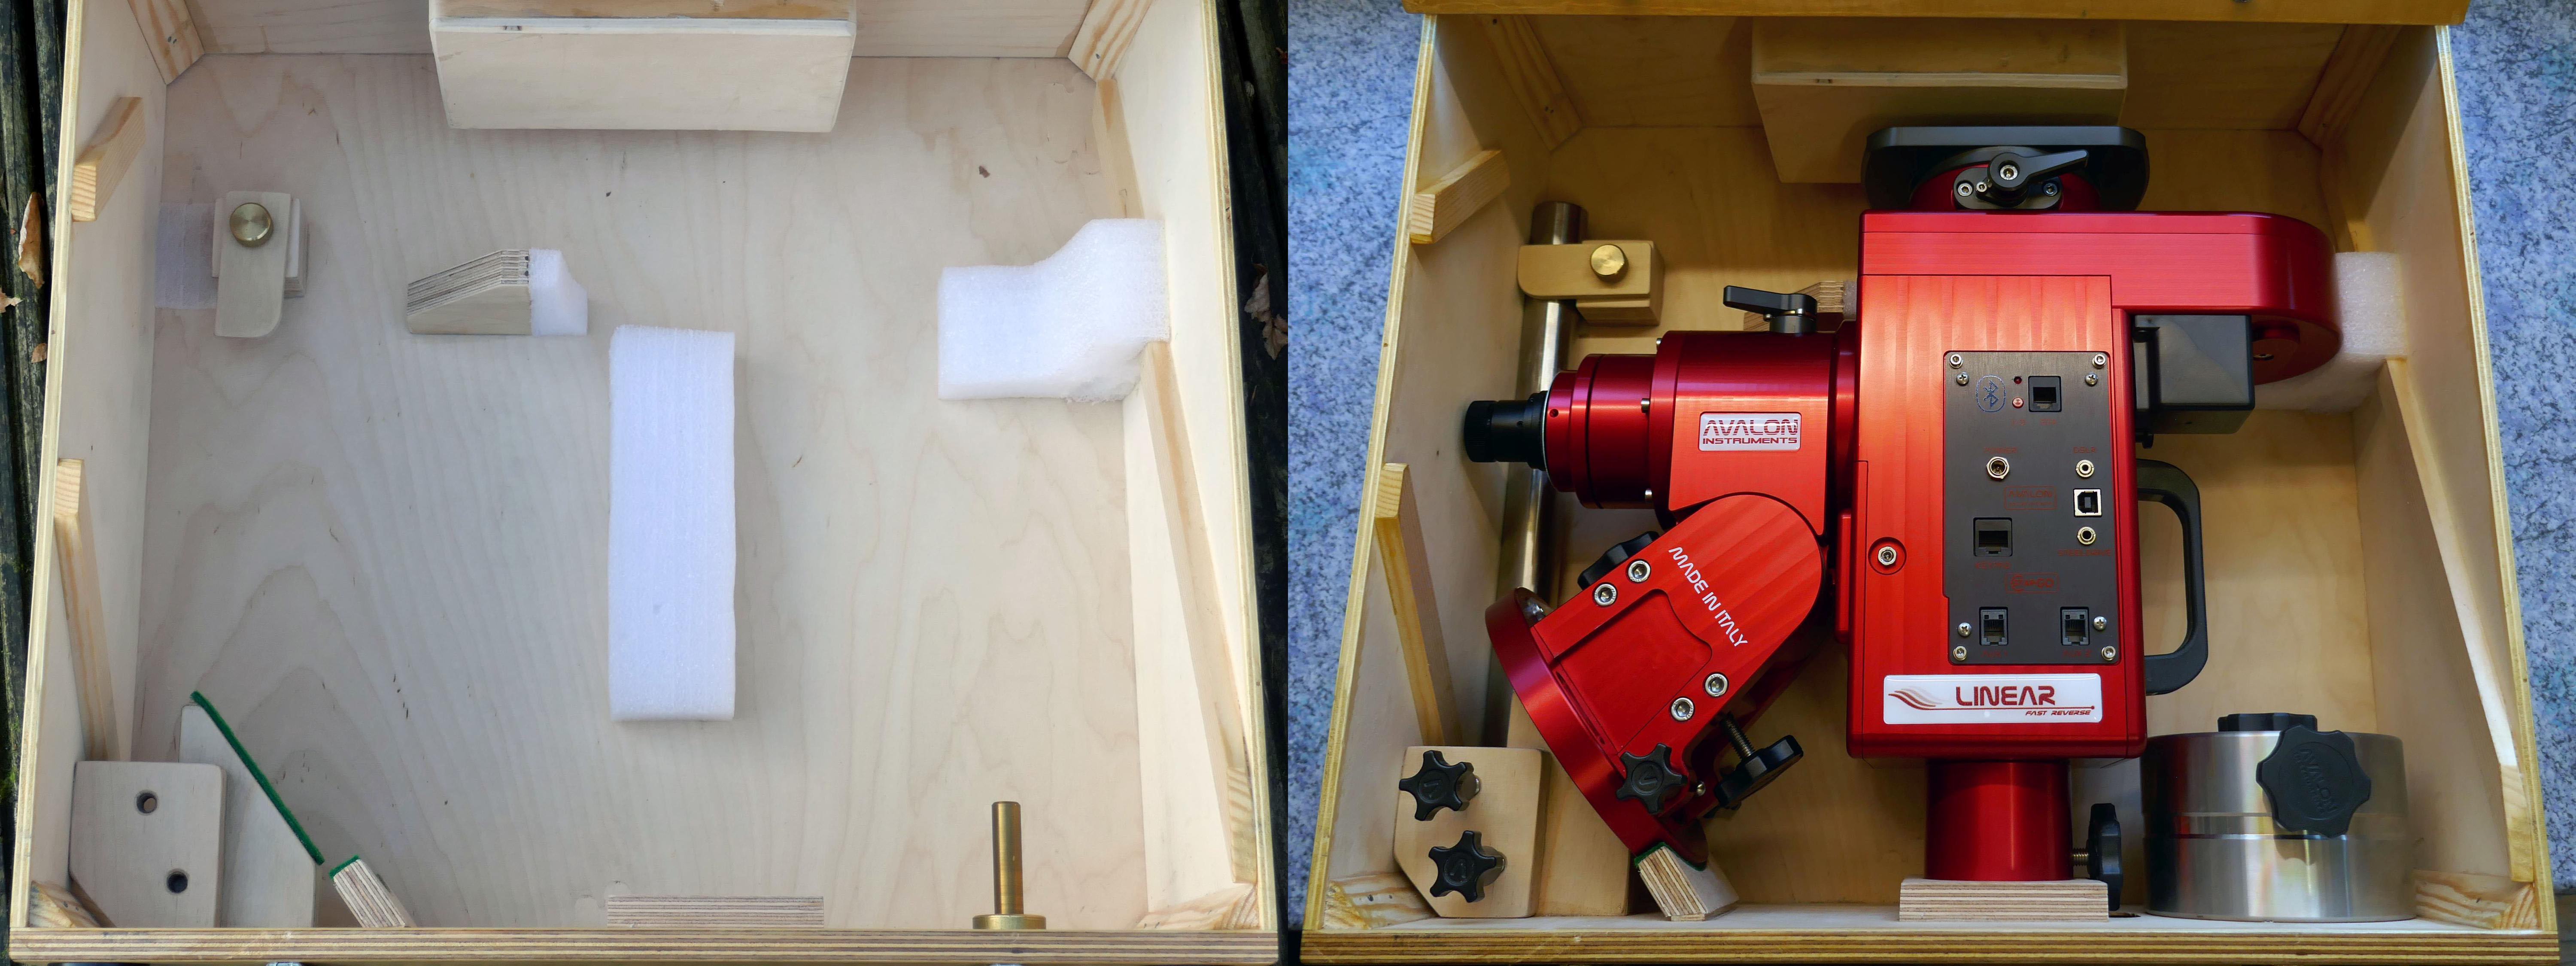
To be honest: Fully armed the box is heavy – really heavy, about 20 kg. Hence you’re forced to find a observation site which is not to far away from your car park. But this is a well-known issue with astrophotograpy.
Connection of a stepper to the Avalon Linear
Find a page in german concerning the connection of a focus motor to the StarGo control here.