Replacing my GP-D2 by the Linear the Vixen suddenly was out of work. So used the comfortable situation to have a mount, where can always work on, even if it is clear outside. No pressure to have the set-up ready for the following night. I intended to replace the SynScan telescope control and built-up a new GoTo system and to get rid of the old one for some reasons. Finally I’ve chosen the OnStep system. Find below my reasons for the decision and my realisation.
Reasons for building a new telescope control
- The backlash compensation did not operate if controlled by the ST-4 port.
- The GoTo is not really fast.
- No knowledge about the precision, microsteps and smallest step width.
- The new control shall be capable of both, high angular resolution and high speed.
During my internet research if found two interesting solutions for a DIY telescope control with GoTo:
I tested both systems on an Arduino. Finally I selected the OnStep for a realisation. An important reason for my decision was the 100% available free source code for the telescope control. Additionally the source code is commented in a very comprehensive way. I also had the feeling that the OnStep solution is a bit more wider configurable regarding motor and gear ratios. In the meantime the project has been grown significantly and you can find different realisations for different hardware plarforms. By the way: I use the ASCOM interface as well as the Android app. I have to compliment Howard very much for his work and publication.
Stepper Motor Drivers
One thing of interest is the selection of stepper motor drivers. My first choice was the DRV8825. This board has limited performance driven at finer mirco step resolutions. Therfore in my case using 1/32 steps was not really possible due to the limited performance of the module in this case. Reason for this is probably that the driver cannot control low currents with the needed accuracy in its base configuration. Informations to that issue can be found in hackaday.com or in german language in http://www.schrittmotor-blog.de or forums.reprap.org (in german). I tried to overcome that issue with the so-called decay hack, but it didn’t convince me.
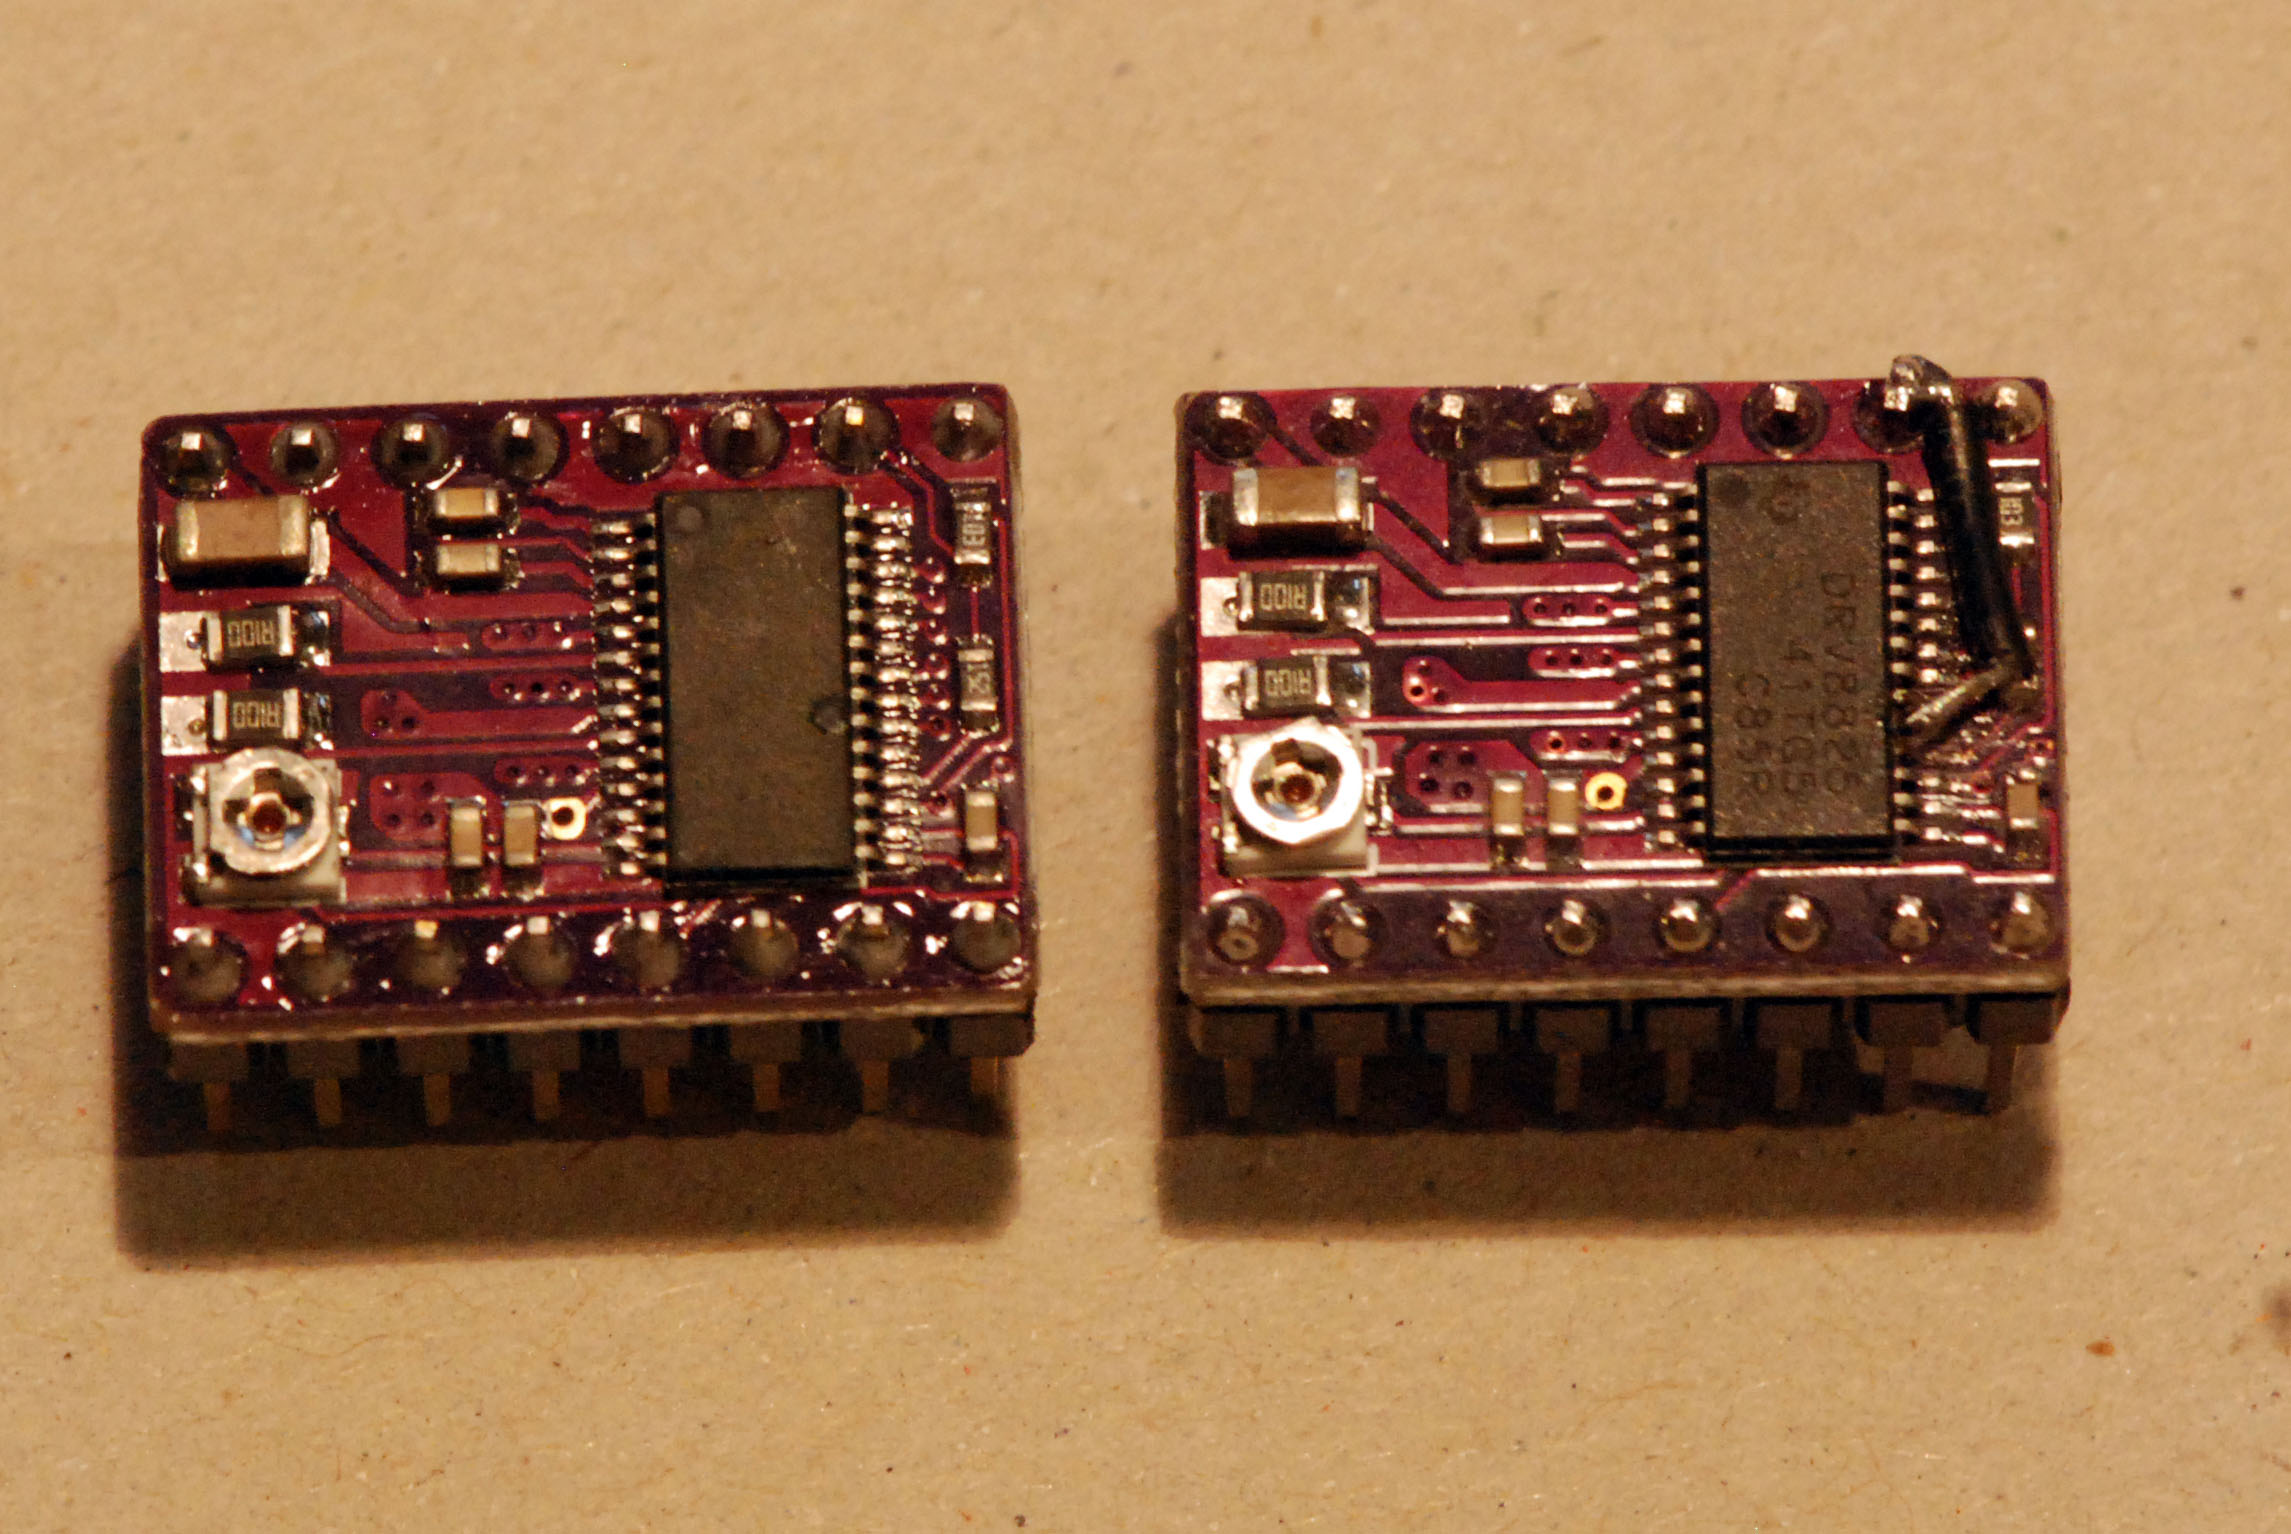
I‘ ve found that the RAPS128 shall not have this issue. Hence I bought a few ones. Unfortunately it is expensive compared to the other one. You can get the 8825 for 1-3€, but the RAPS is in the range of 20€. But anyway, It is worth every cent. No issue with microstepping anymore. I run my controllers at 1/64 stepping which results in a resolution of about 0.2 arc seconds. This is by far enough for any astrophotographic guidance task.
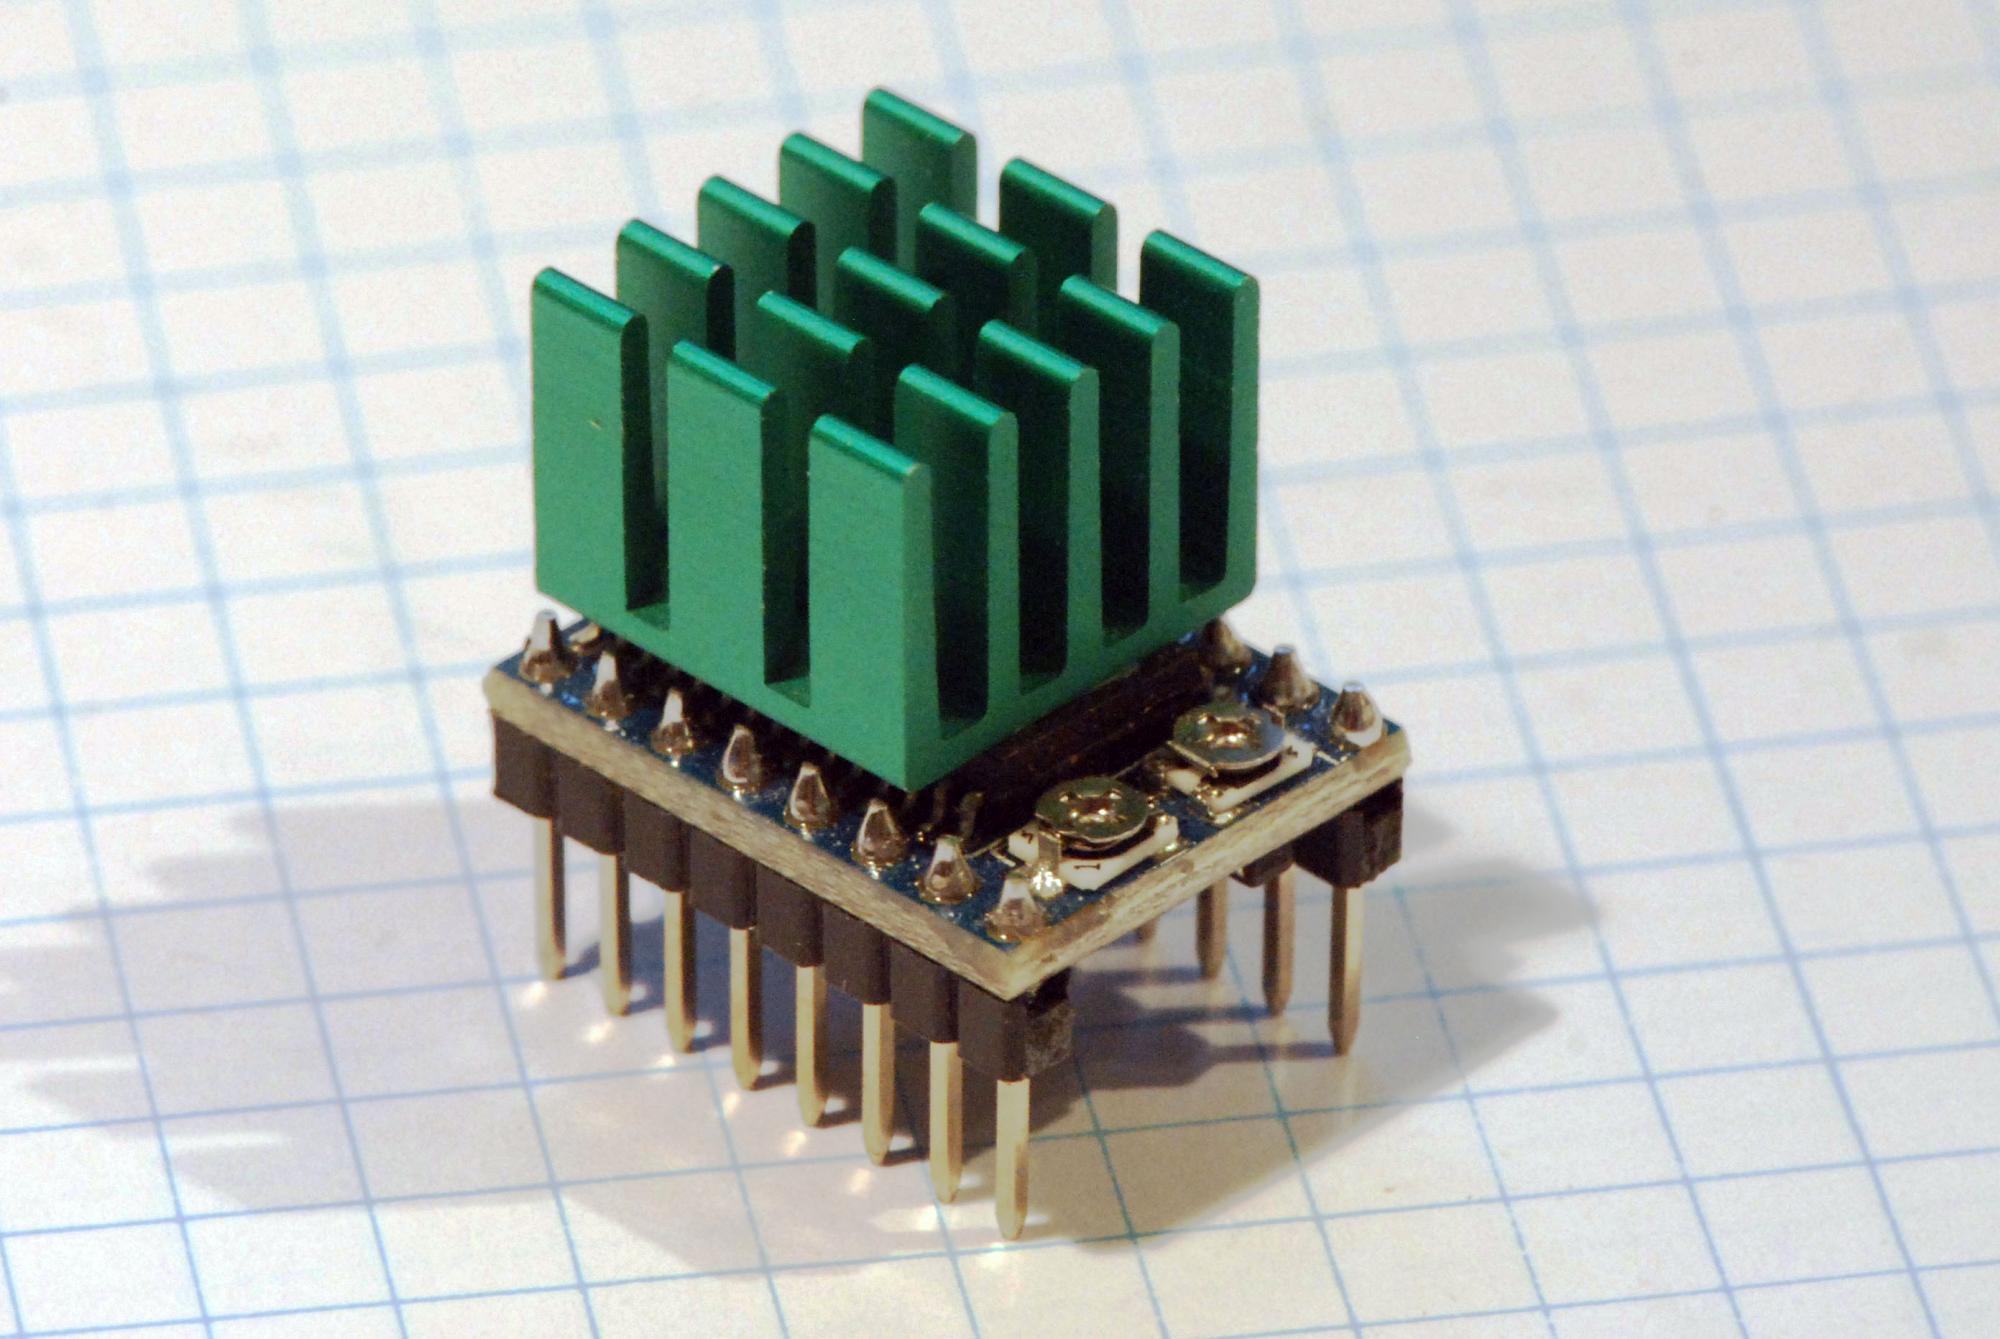
Beside the really achievable high microstep resolution with this board my sytem also is able to run GoTo-speeds in the order of 5 degrees per second. This is really fast, translated into marketing language this is a speed of 1200x. And this without a 24V supply or similar. The system is satisfied with a commercial off the shelf LiIon 12V powerbank .
Comparison SyncScan and OnStep
I think the whole mount behaves better now with the new telescope control. Everything runs a bit more smooth now. One can think the old mount has been replaced by a new one.
- Performance better: faster GoTo, higher resolution
- only one box with electronic
- more modern interfaces (bluetooth, USB)
- better sound (not seriously but it’s the truth)
Pictures
The gallery below shows some impressions of the GP-D2 with the OnStep telescope control.
Hallo Dirk,
ehrlichgesagt habe ich da keine wirkliche Ahnung. Im Forum auf astronomie.de gibt es im Selbstbauteil einige threads die sich mit OnStep auf einem Teensy beschäftigen. Da gibt es vielleicht den einen oder anderen Link. Meine Linkliste enthält leider nur englischsprachige Links.
Wenn es um einzelne Fragen geht, will gerne helfen.
Gruss,
Kai
Hello Kai,
thanks for sharing your experiences with OneStep.
could you provide a date on your article(s)? It is not quiete easy to estimate how actual the information is 😉
And second: Which board exactely did you use (max/min pcb) and which version?
Cheers
Axel
Hello Axel,
yes, the date is a good hint. I face the same issue searching other pages in the net. I don’t have an idea for a solution which is better than putting the date directly into the text, right now.
I built my OnStep in 2016. From time to time I use the system until today. In the meantime most often for imaging with my 200mm lens.
With the pcb it is a bit diffcult. I ordered it from an ebay seller. But I don’t have information anymore. I’ll send you a photo of the board. Hope this helps.
Cheers,
Kai